How to Make Homemade Sauerkraut: Easy Authentic Recipe
This post may contain affiliate links. Read our disclosure policy.
Let’s dive into a super easy and tasty sauerkraut recipe that’ll take your meals to the next level and do wonders for your health. This sauerkraut is delicious and cheaper than what you would find in the grocery store and uses simple ingredients that are easy to find. Making your own sauerkraut at home isn’t just budget-friendly—it’s also a fun way to sneak some probiotics into your diet and give your gut a happy little boost. 🥬✨
Introduction to Sauerkraut
Sauerkraut’s been around forever, and for good reason—it’s a tangy, fermented classic made from cabbage that’s packed with health perks. People have loved it for centuries, not just for the flavor but because it’s basically a probiotic powerhouse with so much beneficial bacteria and high levels of vitamins C and K. 🌟
The best part? You can totally make your own at home! It’s super budget-friendly, and you get to tweak the ingredients and flavors to make it just how you like it. With just a few basics, you’ll have a delicious, gut-friendly condiment that takes any dish up a notch. 🥗✨
Health Benefits of Sauerkraut
Sauerkraut isn’t just delicious—it’s basically a health MVP. 🏆 Here’s why it deserves a spot in your meals:
- Gut Health: Thanks to fermentation, it’s loaded with good bacteria that keep your digestion running smooth and your gut happy.
- Immune System Boost: Packed with vitamin C, it’s like your secret weapon during cold and flu season.
- Heart Helper: With vitamin K on board, sauerkraut supports your heart by helping with proper blood clotting. ❤️
- Nutrient Power-Up: Fermented goodies like sauerkraut make it easier for your body to soak up nutrients from other foods.
So yeah, it’s basically a flavor-packed health hack! 🥬✨

Ingredients Needed
Making your own sauerkraut is crazy simple, and you barely need anything to get started:
- 1 Head of Cabbage: Grab a fresh head of green cabbage or red cabbage—your choice! 🥬
- Salt: Stick with non-iodized salt, like sea salt or kosher salt. It’s the MVP here. My favorite is Redman’s Real Salt.
- Jar: You’ll need a clean glass jar to ferment and store all that tangy goodness.
That’s it! Time to turn those humble ingredients into something amazing. ✨
Preparing the Cabbage
Before you dive into making your sauerkraut, you gotta prep that cabbage like a pro. Start by peeling off the outer leaves of the cabbage—those are the ones that might have dirt or hitchhiking pests. Keeping things clean is key for a solid ferment. 🥬✨
Next, give your cabbage a good rinse under cold water to wash away any leftover grime. Once it’s squeaky clean, pat it dry with a cloth or some paper towels, and you’re ready to roll! 💧🧼

Chopping the Cabbage
Now it’s time to chop that cabbage! The way you cut it makes a difference—thin strips give you a softer, finer sauerkraut, while chunkier pieces keep things extra crunchy. 🥬✨
Grab a sharp knife (or a food processor if you’re feeling fancy). If you’re using a knife, cut the cabbage in half, ditch the core from the top of the cabbage, and slice it into thin strips. Once you’re done, toss it all into a large bowl, and you’re good to go! 🔪💚
Adding Salt to Cabbage
Salt is the MVP of sauerkraut-making—it’s not just for flavor! 🧂 It pulls moisture out of the cabbage, creating the brine you need for fermentation magic. The rule of thumb? About 1 tablespoon of salt per pound of cabbage. Easy peasy.
Once you’ve measured it out, sprinkle the salt over your sliced cabbage and get to massaging it with clean hands. Yup, you’re gonna give that cabbage a good workout! 💪 This helps release its natural juices and makes enough brine to keep everything submerged while it ferments. 🥬✨

Crushing the Cabbage
Now it’s time to crush that cabbage! 🥬 This step is key to getting those natural juices flowing, which will turn into the all-important brine. Just grab clean handfuls of cabbage and give them a good squeeze—really work it until the leaves soften up and start releasing moisture.
Not into the hands-on approach? No worries—you can use a potato masher or a fancy fermentation tool to do the job. The goal here is simple: make it juicy enough so that, when it’s packed into the jar, all that brine keeps the cabbage nice and submerged. 💦✨

Filling the Jar
Now that your cabbage is all crushed and juicy, it’s time to pack it into the jar! 🥬 Start by adding a layer of cabbage to the bottom, then press it down nice and firm. Keep layering and pressing until the jar is filled, but leave about an inch of space at the top.
Don’t overstuff it! You’ll need that extra room for gases to escape during fermentation—nobody wants a sauerkraut explosion. 💥😉

Using a Lettuce Leaf and Weights
To keep your cabbage cozy under the brine, pop a whole cabbage leaf on top of the packed jar. It’s like a little blanket to hold down any floaty bits, making sure there are no air pockets. 🥬💧
For extra peace of mind, toss in a fermentation weight to keep everything submerged under the brine level and safe from air. No fancy glass weight? No problem—a clean, heavy clean rock works too! Just make sure whatever you use is squeaky clean and sterilized—nobody wants uninvited guests (aka bacteria) crashing the ferment party. 🪨✨

Sealing the Jar
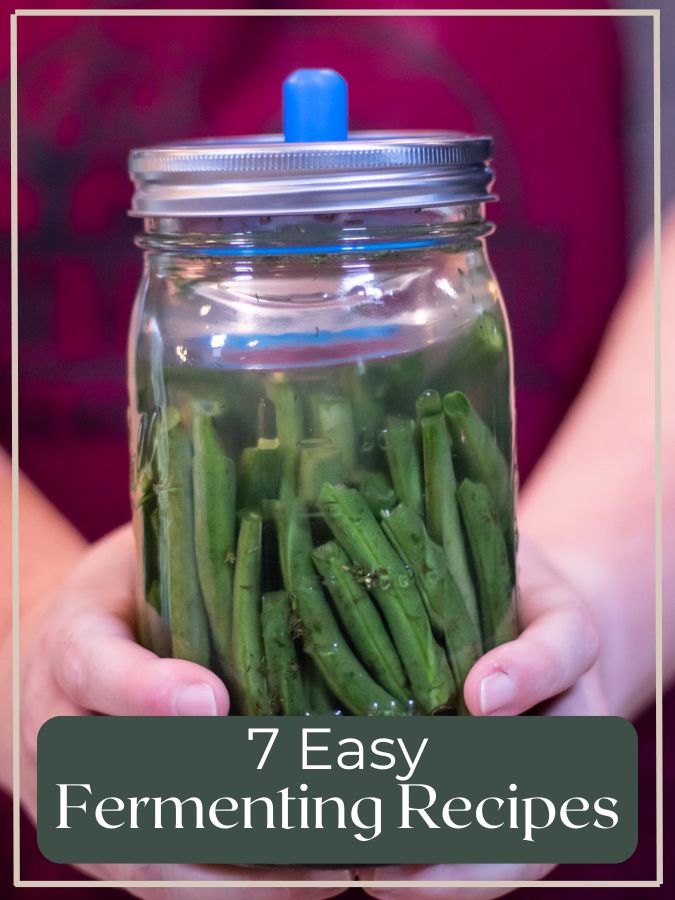
Your cabbage is packed, weighed down, and ready to go, so now it’s time to seal the jar! If you’ve got a fermentation lid (like a pickle pipe), pop it on—this lets the gases escape but keeps the air out. Easy peasy. 😎
Using a regular lid? No worries! Just remember to “burp” it daily—loosen the lid a bit to let out any gas buildup. If you go with the pickle pipe, you can pretty much forget about it and let it do its thing. Less fuss, more sauerkraut! 🫣✨

Fermentation Process
Now that your jar is sealed the next step is to find a cool, dark place away from direct sunlight at room temperature to let it do its fermentation thing. 🏠 The process will take anywhere from two to four weeks, depending on how tangy you like it. Check in on your sauerkraut every so often to make sure everything stays submerged and there’s no mold growth on top.
If the brine drops and you don’t have enough liquid, just top it off with a little salted distilled water to keep that cabbage covered (Don’t use tap water, the fluoride could kill the good bacteria you are trying to grow). The longer it ferments, the more tangy it gets, so give it a taste every now and then to find that perfect flavor. Trust me, it’s worth the wait! 😋✨
Enjoying Your Sauerkraut
Once your sauerkraut is as tangy as you like, it’s time to dig in! 🎉 Pop it in the fridge to slow down the fermentation process. Homemade sauerkraut can last for months in the fridge, though it’s always best when fresh.
You can use it as a side dish, throw it on sandwiches, or even top off different meals. Not only does it bring a unique flavor, but it’s also packing a probiotic punch that’s great for your gut.
With this super simple homemade sauerkraut recipe, you’re ready to make your very own delicious, homemade sauerkraut. If you are excited about learning fermentation, here is another simple recipe for you: 5 Minute Fermented Tomato Sauce. Happy fermenting! 🥳✨
PrintEasy Homemade Sauerkraut Recipe – Probiotic-Rich & Delicious

Learn how to make homemade sauerkraut with this simple, step-by-step recipe. Packed with probiotics and bursting with tangy flavor, this fermented cabbage dish is a healthy addition to any meal. Perfect for beginners, this recipe offers an easy way to enjoy homemade sauerkraut that’s great for gut health and adds a unique twist to your favorite dishes.
Ingredients
- 1 head of fresh cabbage (green or red)
- 1 tablespoon non-iodized salt (per pound of cabbage)
- Optional: caraway seeds or other spices (for flavor)
- Clean glass jar (for fermenting and storing)
Instructions
1. Prepare the Cabbage:
· Remove the outer leaves of the cabbage to ensure it’s clean and free of dirt or pests.
· Rinse the cabbage under cold water, then dry with a clean cloth or paper towel.
2. Chop the Cabbage:
· Slice the cabbage into thin strips for a finer texture, or leave it chunkier for more crunch.
· If using a knife, cut the cabbage in half, remove the core, and slice into thin strips.
3. Add Salt:
· Sprinkle 1 tablespoon of salt per pound of cabbage over the chopped cabbage.
· Use clean hands to massage the salt into the cabbage, helping to release its natural juices and create the brine.
4. Crush the Cabbage:
· Squeeze handfuls of cabbage tightly to release more moisture, making sure the cabbage becomes soft and juicy.
5. Pack the Jar:
· Start by adding a layer of cabbage to the bottom of a clean glass jar, then press down firmly.
· Continue layering and pressing the cabbage until the jar is filled, leaving about an inch of space at the top.
· Place a whole cabbage leaf on top of the packed cabbage to help keep loose pieces submerged in the brine.
6. Weigh It Down:
· Use a fermentation weight or a clean, heavy rock to keep the cabbage submerged in the brine. Make sure the weight is sterilized to avoid contamination.
7. Seal the Jar:
· Attach a fermentation lid (like a pickle pipe) to the jar, or use a standard mason jar lid, but remember to “burp” it daily by loosening the lid to release built-up gas.
8. Fermentation Time:
· Place the sealed jar in a cool, dark location.
· Let it ferment for 2-4 weeks, checking regularly to make sure the cabbage stays submerged and no mold is forming.
9. Finish and Enjoy:
· Once the sauerkraut has reached your desired tanginess, transfer it to the refrigerator to slow down fermentation.
· It’ll last for several months in the fridge but is best enjoyed fresh.
Notes
Serving Suggestions:
- Serve as a side dish, on sandwiches, or as a topping for various dishes.
- Enjoy the probiotic boost and unique flavor with every bite!
Happy fermenting! 🥬✨
Shop This Post:


Love how simple this is!
I was shocked the first time I made it at how incredibly simple it was!
This makes sauerkraut look so easy! It’s wonderful when things that are so good for us are also easy and inexpensive. Thanks for sharing!
You are welcome! It is definitely one of the easiest ferments you can make and a great place to start!